This post will outline the steps necessary to set up Yammer Directory Sync when you are using Office365 with Exchange Online mailboxes.
Overview
Yammer offers a Directory Sync tool as part of its Enterprise offering. With this tool in place, your organization can get the following benefits:
- Automatically create Yammer accounts for newly provisioned users in your directory
- Automatically disable access to Yammer when users are disabled in your directory (when the next sync run executes)
- Update user profile information from your directory attributes
Yammer Directory Sync can be used in conjunction with, or completely without Yammer Single Sign On (SSO) integration.
Setting up Yammer Directory Sync can be a confusing task, especially if you are “all-cloud” and using Office365 and Exchange Online. This post will show you how to configure the Service Account, Directory Sync application, and email settings to get a successful Yammer DirectorySync implementation running. Of course the prerequisite for this article is that you have an active Yammer Enterprise account (won’t work with the free version).
You can find the official documentation on this subject here.
Create Your Service Account
The Yammer DirectorySync application requires an account with admin privileges to your Yammer network. As with most services, it’s best to use a dedicated service account, rather than an individual. To do this, you’ll need to create a new account in Yammer and grant it Admin access within Yammer.
If you are an Office365 customer, this means that you need to create an account with an Exchange Online mailbox, so that you can receive the Yammer invitation email. To do this, you can either create a new cloud account and grant an Exchange license, or if you have DirSync (and optionally SSO) enabled for Office365, create the account on-premises and let it sync up through your Windows Azure DirSync utility. Bottom line, you will have to pay for this license. You’ll see why when we get to email settings later…
If you feel tempted to just add an email alias to an existing O365 account (so you don’t have to pay for another license), I would advise against it. Yammer uses email address to uniquely identify users, and will sync secondary email addresses to existing Yammer accounts.
As an example, let’s say I’m cheap, and I already have a user, adam@domain.com that is a Yammer user and has an Exchange Online mailbox. Now I want to create a yammer_service@domain.com Yammer account, without paying for an Exchange Online account. So I add an alias for yammer_service@domain.com to my adam@domain.com Exchange Online account. Now I can invite yammer_service@domain.com to Yammer, receive the mail in my adam@domain.com Exchange account and sign up for Yammer. However, after DirectorySync is configured, the utility will try and sync up yammer_service@domain.com as a secondary email address for my adam@domain.com Yammer account, and it’ll report a sync error because the email address is already in use by the newly created yammer_service@domain.com Yammer account. So, don’t try and penny pinch here.
Anyway, to continue, create your new O365 account, give it a license to Exchange Online and a mailbox, and then invite that new account to Yammer.
Log into OWA for the new account, view the Yammer invitation email, and click through to create your Yammer account.
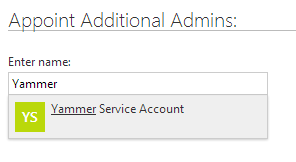
Once your account is created, you need to grant it Yammer Administrator access. To do this, log out of the Yammer service account, and log back in as a Yammer user with Administrative rights. Under the Network > Admins area, add the service account as an admin (you should see it auto-complete as you type):
Then click the button to make the Service Account a Verified Admin:
The Service Account should now be setup and ready to go. The downside of using a Service Account is that it will now appear as a user in the list of your Network users:
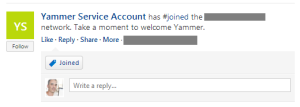
Besides confusing users, there are other side effects of this. For example, when you first setup the Service Account, the All Company feed will get a posting asking users to welcome your Service Account to the network:
Not the best user experience. If anyone knows how to hide a Yammer user from the directory and prevent these kinds of issues, please post a comment.
Installing the Directory Sync Application
Now you need to install the Yammer DirectorySync application. Note that this is different from your Office365/Windows Azure Directory Sync application. Maybe we’ll see these tools merged soon? Hopefully.
You can download the sync tool from a link at the bottom of this page.
Run through the installer.
Configuring DirectorySync
Once installed, open the application. The app runs in two modes, 1) configuration mode, and once configured 2) sync mode. When the app first opens, it hasn’t been configured yet, so will run in configuration mode.
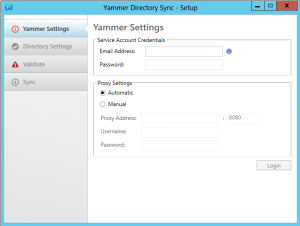
The first step is to specify the Yammer Service Account you created earlier:
Note:
If you have enabled Single Sign On for Yammer already, follow the directions below.
Steps if Single Sign On is Enabled
If you have enabled Single Sign On (SSO) for Yammer, then you won’t be able to specify the password for the Service Account on the first screen. The DirectorySync application is not SSO-aware, and will not direct you to your identity provider’s Sign In page to login. Instead, you will have to get a temporary password for use with a Yammer App. Follow the steps below.
- Login to Yammer.com as the Yammer Service Account.
- Under the Ellipsis menu, choose Apps.
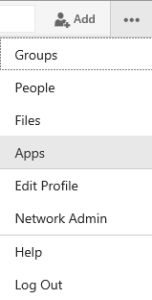
- Scroll down to the All Apps section, and click the Yammer tab. Scroll down to an app such as Desktop, and click on the name of the App.
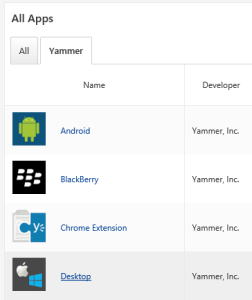
- This will open a modal dialog containing a temporary password that you can use to login with.
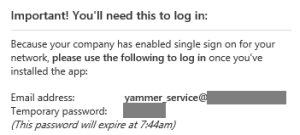
- Enter this password on the Yammer Settings tab of the Directory Sync application.
Don’t worry about the temporary password expiring. Once you authenticate with the temporary password, the Directory Sync application will get an authorization token from Yammer. It will store this token in a configuration file, and use this token from that point on instead of trying to authenticate with the temporary password.
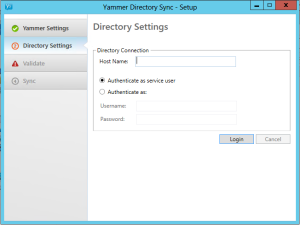
The next step is to configure the Directory Settings. On this screen, you need to select/enter a specific Domain Controller that the DirectorySync application will use to read changes from. This should be a DC that is closest to the server running DirectorySync. Per the installation guide, this should not be a load balanced name, it should be to a specific DC. For connecting to Active Directory, you can either use the Yammer Service Account you created earlier (if you created an on-prem AD account for it), or you’ll need to specify an AD account/credentials that has rights to read from Active Directory (you might need to do this if you used a Cloud-only O365 account for the Yammer Service Account).
Once you’ve configured the Directory Settings, the next step is the Validation step. During Validation, you can get an export of the potential changes that will get synced up to Yammer, and can then fine tune and tweak your LDAP query (by default it syncs every account in the tree, from the root down). This is a good time to take stock of your Active Directory container structure, and your policy around disabling/deleting users.
Many organizations store Service Accounts and objects like Conference Rooms in ActiveDirectory, and when you setup DirectorySync, these accounts will get pushed up to Yammer and receive email invitations. You only get charged for active accounts, and only active accounts appear in the list of Yammer users, and so while these pending accounts are harmless, it’s still better to have a clean setup and restrict what you sync.
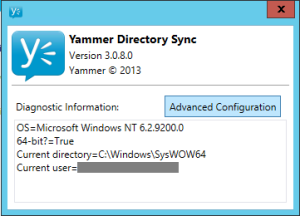
To do this, you can either filter out accounts by AD attributes, or limit your scope to a specific root container. This involves advanced mode, which means you need to open a json configuration file and make some manual edits. To get to this file, right-click the Yammer DirectorySync tray icon, and choose About…
On the dialog that pops up, click the Advanced Configuration button.
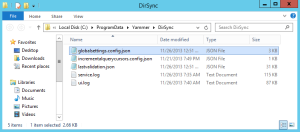
A Windows Explorer window will open, showing you the files in the Yammer Directory Sync configuration folder. The file you want to edit is the globalsettings.config.json file.
Warning:
You should close the Yammer Directory Sync application before editing and saving the globalsetting.config.json file. It caches the file when it opens, and it won’t reflect your changes until you reopen the application.
If you open this file in Notepad or another text editor, you can edit the filter or root directory in the connection settings area. Following is a snippet showing how to filter down to just the Users container in Active Directory. This will focus the Directory Sync utility to just accounts inside this container, ignoring any other peer or parent containers that you might be using to store service accounts or archived/disabled users.
Find the “DirectoryConnections” > “Queries” area. You’ll see two queries, the first one you can edit, and the second one is for the Deleted Objects container which you should not edit. To narrow your scope to a particular OU/Container, add or modify the OverrideRootNamingContext property with the path to the container/OU to use as the new root. Remember your LDAP query syntax here, because if you don’t get it right, the error during validation is completely unhelpful. If it errors during validation, it won’t let you proceed to the next step so be sure to get the query right. Make sure to use “CN=” if you are using a generic Container or for an Organizational Unit, use “OU=”.
|
1 2 3 4 5 6 7 8 9 10 11 12 13 14 |
"Queries": [ { "Id": "6c215fec-24b0-44bb-ae78-61fcae69ace1", "Filter": "mail=*", "OverrideRootNamingContext": "CN=Users,DC=contoso,DC=com", "ShowDeleted": false }, { "Id": "809a5396-3fc6-419f-b022-68a0cf8ceea3", "Filter": "", "OverrideRootNamingContext": "<WKGUID=18E2EA80684F11D2B9AA00C04F79F805,DC=contoso,DC=com>", "ShowDeleted": true } ], |
The Filter can also be used as a limiter. Every organization handles service accounts differently. Some store them in separate OUs, others create AD attributes to distinguish service accounts (isServiceAccount) and have tools and automation to check for those. With Filter or OverrideRootNamingContext, you can use either approach.
Once you’ve got your queries straight, run the validation and check the generated Excel file. You’ll probably see a lot of users that shouldn’t be synced, and others that are marked as Inactive (have been deleted/disabled in AD but not in Yammer). Do any cleanup necessary on your accounts and rerun validation until you are satisfied.
Final Step – Sync and Email Settings
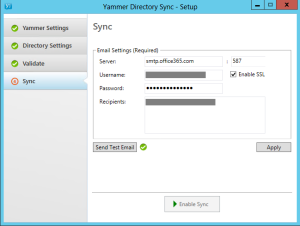
Unfortunately this last step can cause some headaches to get it right. On the Sync tab, you need to provide the SMTP email server, port, and credentials for the DirectorySync application to use for sending status/error emails. If you don’t get past this process, you cannot start a sync.
Exchange Online is by default hardened to prevent unauthorized relaying of email through its servers. What this means is that 1) you need to authenticate to the SMTP server as a user with a valid active Exchange Online mailbox, and 2) You need to change the default From: address in the global configuration file.
For the first item, this is why it makes sense to just pay for the Yammer Service Account to have an Exchange Online license. You can just use this active account to authenticate with. Optionally, you may have another service account that you already have an Exchange Online Mailbox for, and want to just reuse that. Either way is fine, as long as you put in the credentials to an account with an active mailbox. For the second item above, the default From: address is noreply@yammer.com, and Office365 will not let you send email from this address to users in your organization (the Directory Sync application will fail with a generic error message).
To change the From: address, do the following:
- Close the Yammer Directory Sync application.
- Open the globalsettings.config.json file.
- Find the “EmailNotificationSettings” section towards the bottom. In the “FromAddress”, change the address from “noreply@yammer.com” to the email address that you are authenticating to the SMTP server with.
- Save the file and reopen the Directory Sync application.
- Enter your email server information.
For Office365, use the following settings on the email tab:
- Server: smtp.office365.com
- Port: 587
- Enable SSL: Checked
Click on the Send Test Email button. If all went well, you should see a green check box, and get an email to your configured recipient(s).
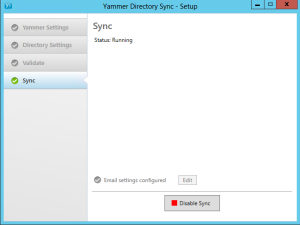
Click Apply, and then click Enable Sync. You are now running in Sync mode. Congratulations, you’ve setup Yammer Directory Sync!
Verifying Your Sync
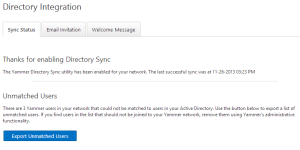
Now that Sync is running, you can verify sync is successful by logging into Yammer as an Admin. On the Network > Users > Directory Integration page, you can see when your last sync completed, and get a list of unmatched users.
These unmatched users are users that are in Yammer, but not part of your sync. It’s a good idea to go through these. You’ll probably see mistake accounts, old accounts that should be purged, distribution list addresses, etc. You can then take this and formulate a bulk update CSV with delete actions to get rid of these accounts for good.
Summary
Setting up Yammer Directory Sync is a pretty simple process. Once you work out your Service Account and email settings, the sync is easy to get running. Please post a comment if you have any questions on the process, or anything else to add that I might have missed. Good luck!



Great post Adam, thank you!
Hi
I did the steps to edit the file globalsettings.config.json but when I open the DirectorySync in step 1 when the service account is placed, it creates another file globalsettings.config.json and the previous where do the changes of the queries renames in .old. Why?
Regards.
Thanks a lot Adam. I was stuck up at the last step (email settings) and a quick Google search led me to here. Strange, why isn’t that json configuration bit documented anywhere?
Anyway, let’s hope Microsoft makes it a little easier moving forward with deeper integration with Office 365 and WAAD DirSync with Password Sync option. There are still a few glitches especially when it is a corporate product. For instance, hiding members, disallowing direct enrolment by going to yammer.com i.e. enforce admin-generated membership only… and so on.
Thanks anyway. Great step-by-step post.
Thanks / Abhi
Is there a way to shut off the welcome email notifications when using Dsync. we want to activate Dsync but it will be a week afterwards before we roll out Yammer. so we don’t want the users to get the email when we are not ready.
thanks
Q6470A
Phil,
It takes a call to Yammer support to turn those invites off. I had to do just that a couple of days ago.
is it possible to perform a manual Dsync with Yammer like you can do in DirSync. I cannot find any info about running a manual Dsync
Pingback: Yammer, Office365 and SSO – status
Pingback: (2014-10-08) Setting Up Yammer DirSync « Jorge's Quest For Knowledge!
Hi there to all, how is the whole thing, I think every one iss getting moree from this site,
and yyour views are good for new viewers.