This post will outline the steps you need to take to configure Single Sign On (SSO) for Yammer and your ADFS infrastructure.
Overview
Yammer offers a Single Sign On capability for its Enterprise customers. With Single Sign On in place, your organization can get the following benefits:
- Immediately restrict access to Yammer when you disable/delete an account in your directory.
- Enable your users to use their regular on-premises credentials to log into Yammer, without managing a separate password just for Yammer.
- Automatically provision new Yammer accounts when users sign in via SSO
Single Sign On can be used in conjunction with, or completely without Yammer Directory Sync.
With Single Sign On in place, users that attempt to login are redirected to your Identity Provider login page, instead of Yammer’s login page. When users login, they login against your own infrastructure, and after successful authentication, are redirected back to Yammer with a token granting them access to your Yammer network.
This post will show you the steps necessary to set this up, against an Active Directory Federation Services infrastructure. The prerequisites before starting this include 1) a functioning ADFS 2.0 installation, and 2) A Yammer Enterprise network.
While the steps themselves are pretty easy, the process is a whole lot harder than it needs to be. I have to be honest in saying that the process is very rough and unprofessional as of the writing of this post, and I hope that Microsoft/Yammer can put some effort into improving this in the future.
Yammer Directory Sync vs Yammer Single Sign On
Before I get into the details, I wanted to touch on the difference between Yammer Directory Sync and Single Sign On. The following table below outlines some of the differences and similarities between the two implementations. Note that if you implement both at the same time, you essentially get all the features (they work seamlessly together):
| SINGLE SIGN ON | DIRECTORY SYNC | |
|---|---|---|
| Automatically provision new Yammer accounts | (after sign-in) | (after sync run) |
| Use on-premises credentials to login | ||
| Synchronize on-premises directory attributes w/ Yammer profiles | ||
| Restrict access for disabled/deleted directory users | (immediately) | (after sync run) |
| Deprovision (suspend) disabled/deleted users |
Directory Sync is responsible for provisioning new users accounts in Yammer, and for synchronizing profile property data from an on-prem directory to Yammer. Yammer Directory Sync also offers a level of protection against access by disabled/deleted users, but it only works when the next synchronization takes place. If Directory Sync determines that an account has been deleted/disabled, during the next Sync run, it will mark that account as Suspended within Yammer, preventing the user from logging in. It isn’t immediate therefore. With Single Sign On in place, if a disabled user attempts to sign in, he/she is taken to your own sign-in page, and authenticated against your directory directly, and denied access. If a user is already signed in, then access to Yammer will continue until the browser’s authentication token cookie expires.
Opening a Service Request
The first step to getting SSO for Yammer is to file a support/service request. You can find the support links on the following page:
http://support.microsoft.com/gp/yammer
Depending on how you are subscribed to Yammer Enterprise (standalone, via Office365 E plan, Yammer Premier Support, etc.) your support avenue will be slightly different. For this particular article, I am going to go through the process for organizations that have Yammer Enterprise via an Office365 E plan, but the experience should be similar for the other methods.
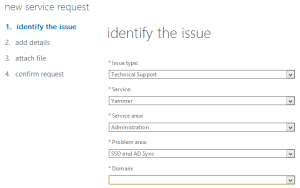
If you have Office365, you can file a support request through the admin portal, under Support > New Service Request, and begin to fill in the details:
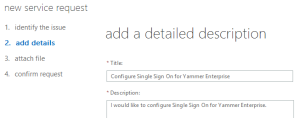
For your request details, just state that you wish to “Configure Single Sign On for Yammer Enterprise”. There is no need to provide further information beyond this, as your request will get assigned to a tier-1 support person, who will just ask you to provide the details all over again (along with a filled-out checklist), before they assign the ticket to the next tier.
In my support request, I provided a ton of information about my ADFS infrastructure, uploaded my token-signing certificate as an attachment (I had to .zip it because it wouldn’t accept a .cer file), and in the end, I had to provide all this information over again.
Filling out the Checklist
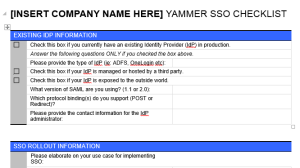
Once your ticket is assigned to the Tier-1 agent, you will receive a response with an SSO Checklist document to fill out. Welcome back to the 1990s folks. It’s a Word document with static images of checkboxes on it. You have to PRINT it OUT, use a pen, and scan it back to digital again. Seriously?
The checklist will ask about your Identity Provider (IdP), and basic information about how you intend to use SSO. Once you have the checklist filled out and back in digital format, you can respond via email to your service request, and attach the checklist.
Providing ADFS Token Signing Certificate and Metadata File
Once you get past the checklist, your request will get escalated to the next support tier, and you’ll get a response from a rep asking for two key pieces of information: 1) your ADFS Certificate, and 2) your metadata file.
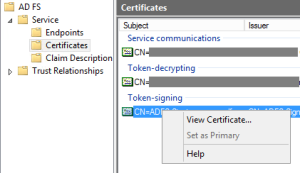
If you’ve ever worked with ADFS and SAML before, you know that there can be many different certificates in use (token signing, token decrypting, HTTPS service certificate, Relying Party encryption certificate, etc), so this isn’t very helpful. The one they are after is your Token Signing certificate. You can find that in your ADFS Management Console, under AD FS > Service > Certificates. Right click the Token-signing certificate and choose View Certificate…
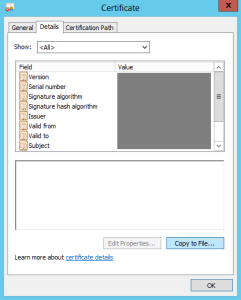
On the Certificate popup, click the Details tab and choose Copy to File…
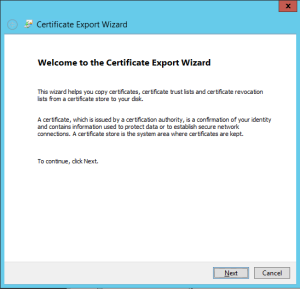
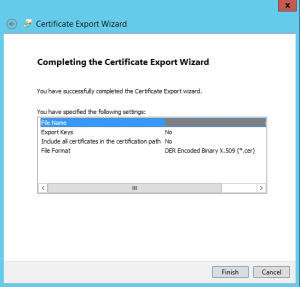
Run through the Certificate Export Wizard.
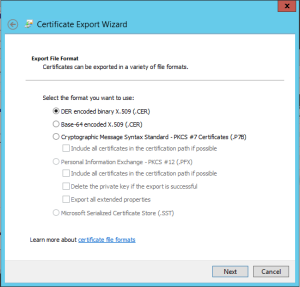
Choose DER Encoded Binary for the format.
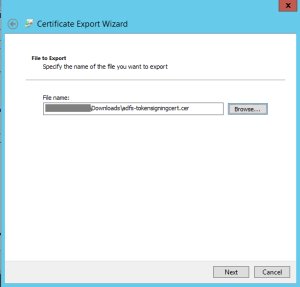
Specify a path and name for the exported file.
Verify that you aren’t exporting the Private Key (this shouldn’t be the case) and Finish. Attach this file to your service request.
Next, you’ll need to get your Metadata file exported. I went back and forth via email on this one, as I didn’t know what they were after. There is no option in the ADFS Management Console to “export a metadata file”. I provided them the url to my FederationMetadata endpoint, which looks something like this:
https://adfs.contoso.com/FederationMetadata/2007-06/FederationMetadata.xml
I got a response back that I instead needed to give them an exported metadata file, and should contact my network administrator or a consultant to get it :). So I just loaded that metadata URL in my browser (made sure it worked, you should get XML back), and chose File > Save As… and named it FederationMetadata.xml, and attached that to the service request. That was all they needed.
Configuring the Relying Party in ADFS
Once you’ve given them the metadata file and Token Signing certificate, support will respond back with a metadata file of their own for you to import. Once you receive the metadata file, you can begin to configure the Relying Part Trust in ADFS. Following are the steps:
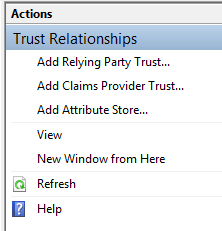
From the ADFS Management Console, choose AD FS > Trust Relationships > Add Relying Party Trust.
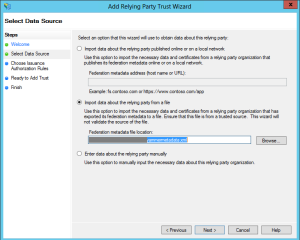
On the wizard, continue to the Data Source screen, and choose to Import data about the relying party from a file, browsing to the metadata file that Yammer/Microsoft provided you.
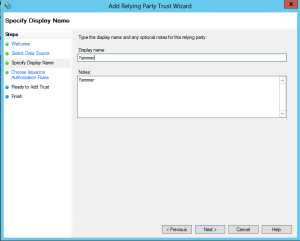
Give your Relying Party a name (I just called mine Yammer).
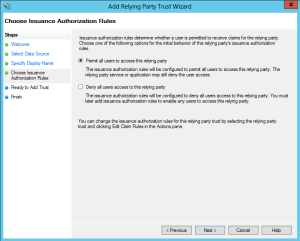
Permit all users, and finish the wizard.
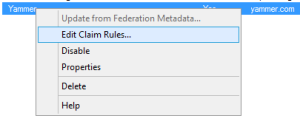
Navigate to AD FS > Trust Relationships > Relying Party Trusts, right-click your newly created RP, and choose Edit Claim Rules…
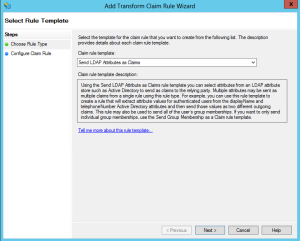
On the Issuance Transform Rules tab, click the button to Add Claim. Choose the Send LDAP Attributes as Claims option.
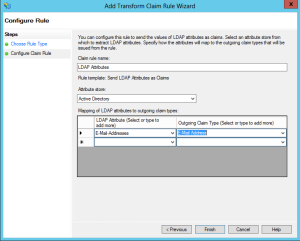
On the next screen, give your claim rule a name, choose Active Directory as the provider, and specify the mapping. On the left side, choose E-mail Addresses. On the right side, choose E-mail Address.
Those are all the claim mappings you need. Finish the wizard, and send a reply back to your support rep that you have imported their metadata file.
Scheduling a Test Run
After configuring the Relying Party, you’ll be contacted to setup a test run.
During the test run, they will switch your production Yammer tenant over to SSO, and ask you to login. There is no test tenant to work with unfortunately, so your live Yammer network will be affected. It’s a good idea to let your organization know ahead of time that there will be some disruption to Yammer during this time.
It took a couple of tries before we got it right. It turned out that there were misconfigurations on the Microsoft/Yammer end, and my support rep had to escalate internally to get help and resolve it. I had to import an updated metadata file as well. If you’ve followed my steps above, you’ll know that your end is just fine, and if your test run doesn’t work, that the problem is likely on the Yammer end.
Overall, they don’t seem to have a ton of experience in dealing with SSO, and with ADFS in particular, so expect to have a few hiccups before it works.
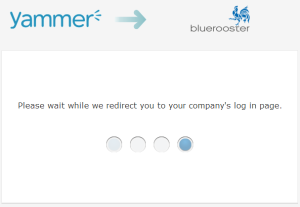
Once it works, you can attempt to login to your Yammer network from the browser, and you should see the redirections taking place:
SSO Side Effects and Experience
With SSO in place, users will now login with their on-premises credentials against your ADFS infrastructure. This has a couple of side effects, 1) many mobile or other Yammer Apps are not SSO aware, and 2) access to external network can be affected.
Authenticating to Apps with SSO in Place
Apps that you have already authenticated with prior to turning on SSO will continue to function as-is, unless you explicitly sign out or revoke access for those apps. This is because the apps store an authentication token rather than your username/password, so they will continue to work with the issued token.
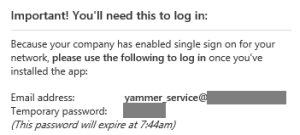
For installing or accessing new Yammer Apps after SSO is turned on, you will need to get a temporary password to use to login to the app with. I described this process a bit in my last post on Yammer Directory Sync – essentially from the web site you can view the details of the app, and it will reveal a temporary password for you to use:
Once you authenticate the first time with the temp password, the App will get an authentication token, and continue to work from that point on.
External Network Access
After SSO is turned on, access to External Networks is affected as well. If you have already logged in to your main network via SSO, and obtained the token from ADFS, then when you attempt to access an External Network, you will be automatically logged into that External Network with the same account. This can be a bit frustrating if you use different email addresses across different networks. You might have to use different In-Private (IE) or Incognito (Chrome) browser sessions to deal with this.
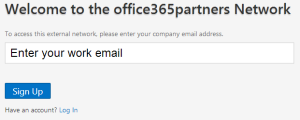
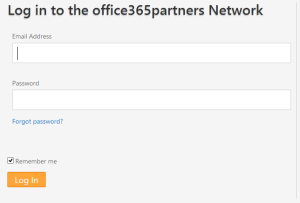
On the flip side, if you have not authenticated with your main Yammer network via SSO, and go straight to an External Network, you’ll get the usual Yammer Sign In screen.
This has the potential to confuse your SSO users, since it asks for a username and password.
Should they enter their current on-premises password? Should they enter their pre-SSO password? Actually, they shouldn’t enter any password at all. If they are logging into the External Network with their on-premises email address, the login form will redirect them to your IdP sign in page, and ignore the password anyway. This means that if their account is disabled/deleted on-premises, it will also restrict their access to External Networks as well.
Summary
Hopefully you’ve gotten a sense for the steps involved in setting up SSO for Yammer. If you experience changes in the process, please post a comment and I’ll update the post.


I have recently created an App on my companies private network which has SSO implemented.
I unfortunately am still prompted with the yammer login when trying to use the REST API
Any help would be appreciated.
Thanks for the write up Adam. Do the Yammer mobile apps work with this setup ? Also, if I have Office 365 setup with ADFS, does this mean that single sign on across both SharePoint Online and Yammer is all working gloriously together?
Hey Jeremy,
The Yammer apps do work with Single Sign On enabled. You have to get a temporary password to login with, and after first login to the app, the app should retrieve and store a token to continue to authenticate with in the future.
http://success.yammer.com/wp-content/uploads/2013/06/Activate-Your-Mobile-Device-SSO-exceptions.pdf
http://support.microsoft.com/kb/2840525
If you have O365 SSO enabled, then yes, you do get the goodness of being signed in to both. It depends on how you have your IE Intranet Zone settings configured.
If you have the url to your ADFS server in your Intranet Zone (IE > Tools > Internet Options > Security > Local Intranet > Sites > Advanced), and your Intranet Zone is configured to “Automatic logon only in Intranet Zone” or “Automatic logon with current username and password” (the first is the default for most installations), then when you login to either Yammer or Office365 with SSO enabled, you will get logged in automatically with no prompts, as if you were running a site with NT/Windows Authentication enabled.
If you don’t have the ADFS site in your Intranet Zone, then when you login to either Yammer or Office365, you will be prompted for credentials when redirected to ADFS. If you successfully authenticate to one of those properties, then when visiting the other property you will not be prompted for credentials again (since you already authenticated with ADFS and received a token). This is of course assuming that both Yammer and Office365 use the same ADFS, and that you are using the same browser session to access both.
I justed went through the same experience. I agree that the process has a lot of room for improvement. Also, in the near future it should not be necessary anymore when Yammer will be able to authenticate directly through your Office 365 Windows Azure AD.
I did notice a couple of differences:
1. I did not have to fill out the checklist
2. I did not have to provide the signing certificate (I guess they took it from the metadata file)
3. As Outgoing Claim Type I had to specify SAML_SUBJECT rather than “E-mail Address”.
Hey Gerard,
They gave me the runaround about SAML_SUBJECT too. I really didn’t know what they were talking about. In the right-hand pane in ADFS claims rule dialog, there is no SAML_SUBJECT item, and if you type it in manually, it changes the casing to “Saml_subject”, and we continued to have problems during the trial run like that. I reverted back, pushed on them about this, and the tech changed something on his end, and it worked, and I could continue to use E-mail Address.
Pingback: Webcast #3 – Le service de Distributed Cache avec Vincent Biret | PimpMySharePoint
Thanks for the post, very helpful. I’ve just opened my ticket via the Office 365 portal, I will let you know how it goes.
Thank you Adam for putting this together. We tried to get this working for our company and found it to be really frustrating. Our support person had to escalate it a few times and then the transition was very difficult for us and our users.
We eventually got it working and we hoped it would help our user adoption. Unfortunately we didn’t see more than the normal people using it.
We are trying another vendor, yapmo, and they were able to sync the users with their tool and set up ADFS for us. It only took 30-45 minutes for everything to get completed. Also all the users transitioned seamlessly over and no need for crazy one time passwords for mobile apps. We have everyone in now, so we are hoping to see better adoption since that is what they claim.
Great Article and was soo much better than the yammer document. The one thing we noticed was that to get it work, we actually had to set the claim rule to be SAML_SUBJECT instead of email address. maybe it was just how the yammer guys set it up for us but things didn’t work until we adjusted that.
Has anyone else had issues getting single sign on to work on Non-IE browsers?
SAML_SUBJECT for me here too. Microsoft have no clue on how to write an integration guide for Yammer. I’ve gone back and forth asking for instructions on what to do and all they do is send me the checklist. Your guide was very helpful although I discovered it after I did the initial setup nd hopefully I’ll get my integration working
Pingback: Webcast #3 – Le service de Distributed Cache avec Vincent Biret
There’s an update-to-date blog on how to configure adfs for yammer sso here –
http://blogs.technet.com/b/israelo/archive/2014/08/08/creating-yammer-relying-party-trust-in-adfs.aspx